Overhead damage requires a clear space

Ceiling Leak Water Damage in Waco

Water held above a ceiling can threaten the room beneath it before the source is obvious. A controlled assessment separates the occupied area, identifies the leak and examines the wet assembly from safe access.

(888) 527-9134Start with the overhead leak
Ceiling stability assessment Source tracing Accessible cavity drying
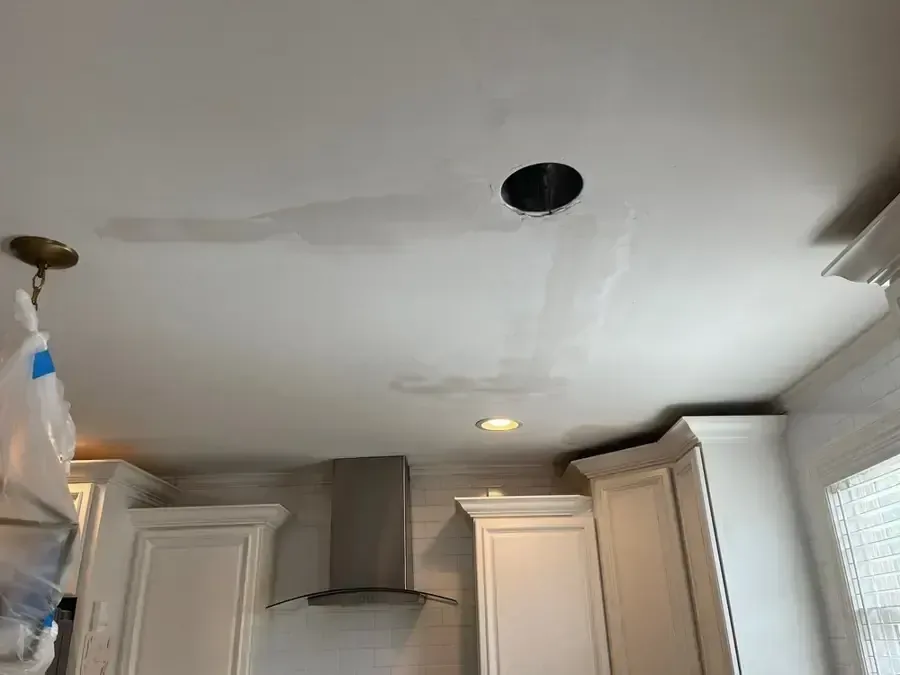
Discolored kitchen ceiling with an open light fitting above cabinets
Right now

First steps for ceiling leak water damage in Waco

  1. 1

    Clear the space below

    Residents should stay away from sagging panels and water near overhead electrical fixtures. Furniture should only be moved when that can be done without entering the unsafe area.

  2. 2

    Note the timing of drips

    A connection with rainfall or use of an upstairs fixture can help the source investigation. Describe the pattern without operating a suspected leaking fixture just to reproduce the damage.

  3. 3

    Arrange access above the room

    The assessment may need an attic hatch or entry to the room overhead. Access permission and a clear route help establish the leak path without unnecessary disturbance below.

  4. 4

    Preserve visible damage records

    Photos taken safely before opening the ceiling document stains and panel condition. Later images of the exposed cavity help connect removal decisions with the actual materials found wet.

A ceiling that changes shape needs attention before it receives a cosmetic repair. Water can add weight to softened panels and collect around lights or wall junctions. In Waco, ceiling leak cleanup starts by assessing the space beneath the damage and establishing safe access to the wet assembly. The source may be above the room or farther along a concealed route.

Describe the ceiling change before disturbing it

At a home in Dean Highland, useful observations include whether the panel is sagging, where dripping appears and which fixture or room sits above it. An occupant can record these details from a safe location. Pushing a panel, puncturing a bulge or climbing beneath it can disturb weakened material before its condition is understood.

A stain that appears during fixture use may point the investigation toward plumbing, while weather related dripping can require roof inspection. The source assessment should resolve that question. Bathroom leak restoration is relevant when an upper fixture or seal has wetted the overhead assembly below.

Typical cost ranges

What does ceiling leak water damage cost in Waco, TX?

Ceiling leak cleanup in Waco depends on panel condition, cavity access and water movement into adjoining walls. A contained overhead area may need limited work, while connected assemblies require broader inspection and drying. Electrical evaluation, source repair and decorative ceiling replacement should be identified separately in the project scope.

Contained ceiling cavity

$1,000 to $3,500
  • Localized overhead material assessment
  • Accessible cavity inspection
  • Focused retained framing drying

Ceiling and wall junctions

$3,500 to $7,000
  • Connected wet wall edges
  • Additional selective material openings
  • Wider moisture monitoring area

Several connected rooms

$7,000 to $12,000
  • Multiple overhead wet sections
  • Expanded room access coordination
  • Detailed repair readiness records

These planning ranges vary with water category, affected floor area, material class and the delay before drying. Access and disposal also affect the scope. The water damage cost calculator allows those conditions to be compared.

Step by step

How ceiling leak water damage is handled in Waco

The restoration technician records the wet materials and dry comparison readings. That inspection sets the removal boundary, equipment arrangement and measurements needed before repairs begin.

  1. 1

    Establish overhead working conditions

    The ceiling stability and electrical exposure are assessed before access. The space below is separated so material handling does not conflict with normal movement through the room.

  2. 2

    Identify the water route

    Inspection connects the likely source with wet panels and wall junctions. Accessible readings help determine which compartments need opening and which surfaces can be checked without removal.

  3. 3

    Treat the exposed cavity

    Damaged layers are removed as needed, then retained materials receive a drying arrangement. The setup accounts for enclosed corners and the moisture held above the visible ceiling plane.

  4. 4

    Check before installing finishes

    Repeat measurements and source repair status support the closure decision. The owner receives a clear account of the opened area and any remaining work affecting ceiling replacement.

Look beyond the central damaged panel

In Brook Oaks, the cleanup boundary may include the wall beneath a ceiling edge, even if most dripping occurred near the room center. Water can follow framing and enter adjoining cavities. Inspection should compare the visible damage with moisture readings around the perimeter so a small ceiling opening does not leave a connected wall section untreated.

  • Light openings can expose electrical concerns within wet material.
  • Panel seams may reveal movement or moisture beyond a stain.
  • Insulation above the finish can retain absorbed water.
  • Wall junctions can carry moisture down toward floor level.

Make each opening serve the recovery plan

A property in Austin Avenue may need selective ceiling removal to reach damaged insulation or saturated framing. The opening should be planned around material condition, safe handling and drying access. Keeping a weakened panel solely to reduce visible demolition can leave a safety problem, while unnecessary removal can add finish repair without improving access to the wet assembly.

After the source is corrected and affected layers are addressed, drying focuses on the materials that can remain. Equipment needs a path to the wet cavity, along with moisture control in the room. Structural drying follows the response at repeat locations so a comfortable room temperature is not mistaken for complete overhead recovery.

The handoff for ceiling repair should identify the source, removed materials and the condition of retained framing. Any electrical assessment or access restriction should also be clear. With those details established, replacement panels and decoration can follow the actual recovery of the assembly instead of simply hiding the damaged surface beneath a new finish.
Waco, TX service area
Service area

Ceiling leak water damage across Waco and nearby towns

Ceiling leak restoration in Waco includes overhead material assessment, connected wall inspection and drying access coordinated with the source repair above the affected room.

The same service nearby: ceiling leak water damage in Woodway, Bellmead, Lacy-Lakeview.

Water damage restoration in Waco · every town covered

Answers

Ceiling Leak Water Damage questions in Waco, TX

Is a sagging ceiling safe to stand under?

The area should remain clear until its condition is assessed. Water and weakened panels can create an overhead hazard. Occupants should avoid touching the bulge or placing themselves beneath it to investigate the source.

Can a ceiling leak come from another room?

Yes. Water may travel along framing before appearing through the finish. The inspection connects the visible damage with accessible overhead spaces rather than assuming the source sits directly above the first drip.

Should the upstairs fixture be used to test it?

A suspected leaking fixture should not be operated casually to reproduce the problem. The source investigation can establish an appropriate test while controlling additional discharge and protecting the affected room below from further wetting.

Do ceiling stains require panel removal?

The condition and concealed moisture determine the decision. Some finishes may remain after assessment, while softened panels or inaccessible wet layers need opening. The purpose of removal should be explained before cosmetic repair is planned.

Why measure the adjoining wall?

Ceiling junctions can transfer water into a wall cavity. Testing the connection helps define the full affected assembly and prevents overhead repairs from hiding damp material that continues toward the floor below.

When can the room return to normal use?

The decision depends on overhead stability, electrical safety and the cleanup boundary. Drying equipment and open assemblies can also affect occupancy. The restoration plan should explain which areas remain restricted and what must happen before access changes.

Still dealing with it?

A softened ceiling needs a safe inspection of the panel, the cavity and the source above it.

(888) 527-9134Assess ceiling conditions
24/7 emergency dispatch

Plan access above the damaged room

Describe sagging, dripping and nearby fixtures so the assessment can begin with the relevant overhead concerns.

(888) 527-9134Discuss the ceiling cavity
(888) 527-913424/7 water damage help